Now it is possible to redact your documents with LibreOffice to remove/hide sensitive information, and I’ll try to share some info about it via a 2-part series of blog posts. You can also check out the Collabora’s blog post for some more information probably with a better presentation, and a more user-centric view.
What?
Redaction in its sanitization sense is the blacking out or deletion of text in a document, or the result of such an effort. It is intended to allow the selective disclosure of information in a document while keeping other parts of the document secret. Typically the result is a document that is suitable for publication or for dissemination to others than the intended audience of the original document. For example, when a document is subpoenaed in a court case, information not specifically relevant to the case at hand is often redacted. Redaction in Wikipedia
Although there are some proprietary software applications in the market for this purpose, they have their own limitations like lack of support for open/libre document formats. Thanks to LibreOffice’s great support for various file formats, and our recent work on implementing this new feature on top of it, it is now possible to redact most of your documents without leaving the comfort of your favourite office suite.
How?
- Open your document in LibreOffice
- Click (Tools ▸ Redact) from the main menu, and wait for your document to be prepared for redaction (converted to an internal meta-format, and transferred to Draw)
- Do the redaction by using the “Rectangle Redaction” and the “Freeform Redaction” tools on the “Redaction Toolbar”
- Save & share the in-redaction copies of the document with peers either in the modifiable (odg) or the verbatim (pdf) format at your option
- Once you are ready to finalize the redaction, click the desired option on the “Redacted Export” tool on the Redaction toolbar
Redaction command in the Tools menu of Writer:

Starting redaction in Draw (Redaction toolbar is in the green rectangle):

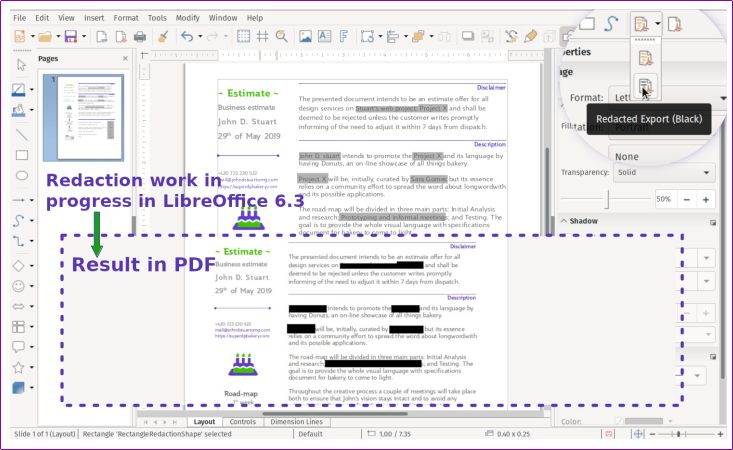
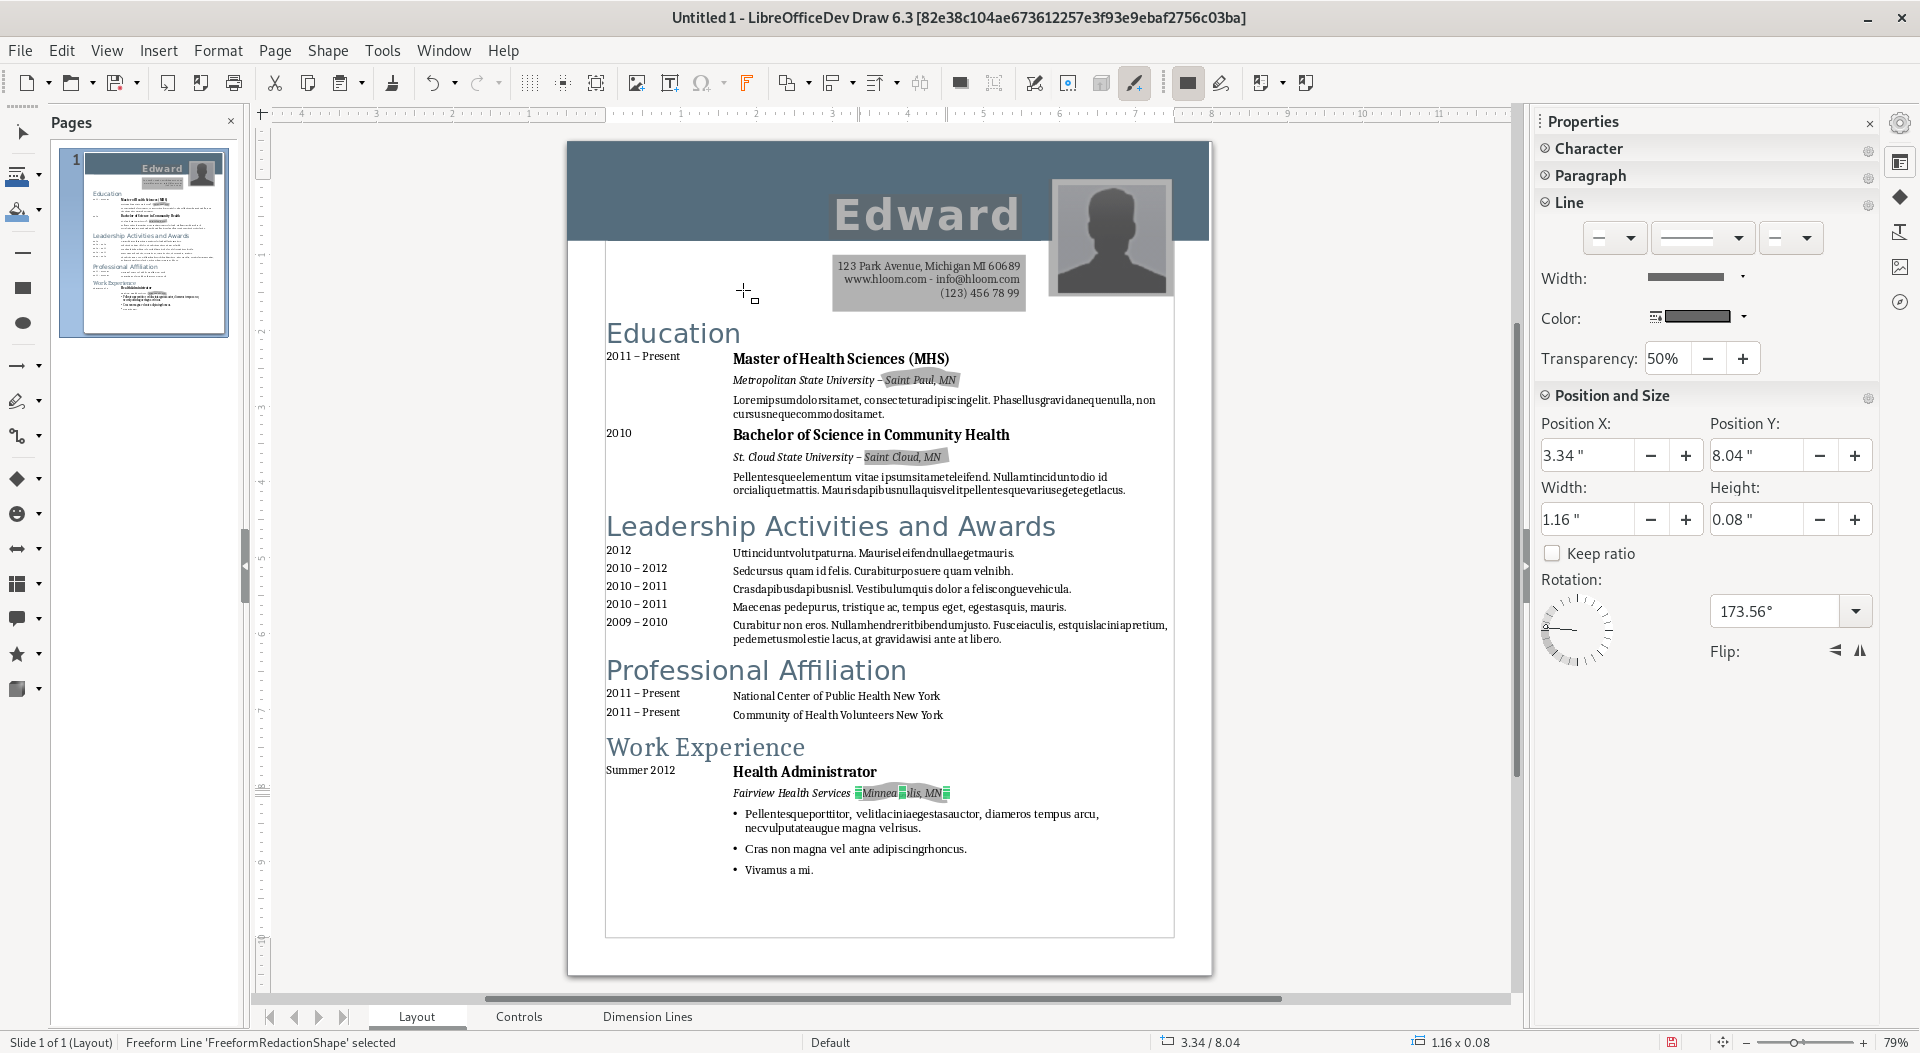
Screenshot while redacting a document in LibreOffice:
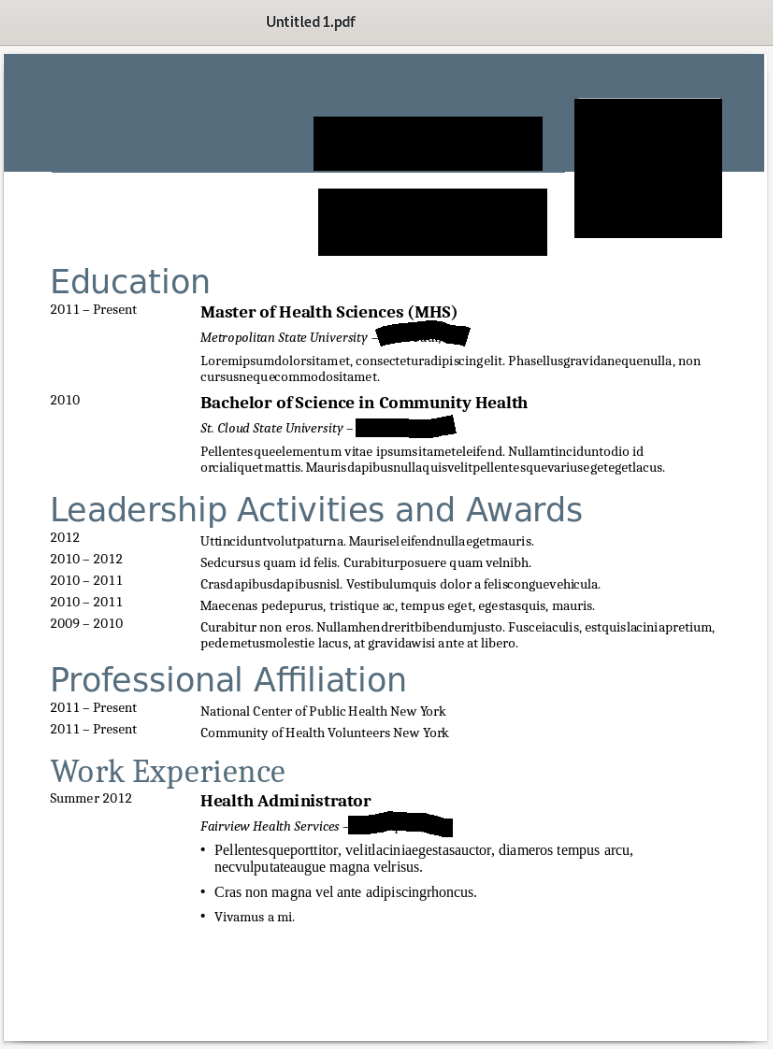
Screenshot of a redacted document, finalized and exported as PDF:
Where and when?
The feature was developed for Collabora Office 6.0, directly on LibreOffice core master, and is already available in LibreOffice 6.3, and also on all recent snaphots of Collabora Office. If you are going to try it with a Collabora Office snapshot, I recommend getting an 6.2 snapshot.
Tips
- As a result, you will have a pixellized version of the redacted document in PDF. There will be no selectable text in it, and the redacted content will be non-existent.
- During redaction, the redaction shapes will be transparent and in grey so that the user can see what they are redacting.
- There are currently 4 tools on the Redaction toolbar (from left to right): Rectangle Redaction, Freeform Redaction, Redacted Export, Direct Export to PDF
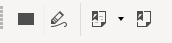
- The Rectangle Redaction tool allows the user to mark the content for redaction by drawing transparent rectangles covering the content
- The Freeform Redaction tool allows the user to mark the content for redaction by drawing freeform lines/polygons covering the content
- The “Redacted Export” button box has two options: “Redacted Export (Black)” and “Redacted Export (White).” When clicked, it will finalize your document (by converting the transparent grey redaction shapes to opaque black or white shapes), and export as a pixellized PDF file. The “White” option might be preferred to save toner while printing.
- The Direct Export to PDF button allows the user to take an in-redaction copy of the document in PDF to share as a verbatim copy for review
Dev Notes
- Most of the redaction related methods are in the SfxRedactionHelper class.
- Redaction toolbar is defined in sd/uiconfig/sdraw/toolbar/redactionbar.xml.
- When user clicks the “Redact” option on the menu, we;
- Create GDIMetaFile objects (one for each page),
- Open a new Draw document
- Insert each GDIMetafile into a new Draw page
- Make sure position and size is correct
- Adjust the page size and margins to match the source document
- Automatically open/show the redaction toolbar if it isnot already opened
- When user clicks on one of the two Redacted Export buttons on the toolbar, we;
- Make all redaction shapes opaque and black/white (based on user choice)
- Ask for save location for the pdf
- Catch the page objects in the pdfexport filter, and pixellize
- Change the redaction shapes back to transparent/gray after export
And here is a list of related commits if you would like to see what other changes were done:
- Redaction: Handle multiple Writer pages
- Add Redaction Toolbar
- Forge the freeform redaction tool
- Make the text on Redaction toolbar buttons visible
- Support bitmap PDF export for Redaction
- Handle redaction finalization: Black
- Use named shapes for redaction
- Add style options to redaction export
- [Temp icons for the redactedexport commands](Temp icons for the redactedexport commands)
- Create the SfxRedactionHelper class
- Handle different page sizes for redaction
- Enable redaction for Impress
- Add RedactDoc to Tools menu of Impress
- Protect page position during redaction
- Add direct pdf export to the Redaction toolbar
- tdf#125063: Don’t depend on content size for Page sizing
- Respect page margins of the source doc during redaction
- Redaction: First steps
- Add method DocumentToGraphicRenderer::getPageCount()
- Redaction: Adjust offset for multiple Calc pages
- Add Redaction toolbar icons from colibre to tango (by Noel Grandin)
- tdf#124377: enable anti-aliasing metafile during redaction (by Aron Budea)